


In this article we connect a DS18b20 module to a Raspberry Pi Pico and we will use micropython to display the temperature returned from the module.
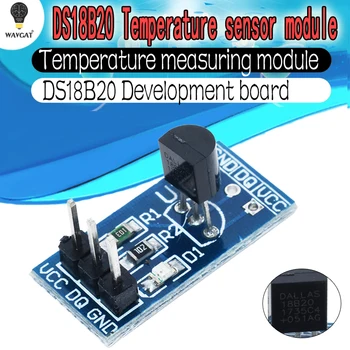
I used the following DS18b20 module
Specifications
The following is from the datasheet
The DS18B20 digital thermometer provides 9-bit to 12-bit Celsius temperature measurements and has an alarm function with nonvolatile user-programmable upper and lower trigger points.
The DS18B20 communicates over a 1-Wire bus that by definition requires only one data line (and ground) for communication with a central microprocessor. In addition, the DS18B20 can derive power directly from the data line (“parasite power”), eliminating the need for an external power supply. Each DS18B20 has a unique 64-bit serial code, which allows multiple DS18B20s to function on the same 1-Wire bus.
Thus, it is simple to use one microprocessor to control many DS18B20s distributed over a large area.
Features
Unique 1-Wire® Interface Requires Only One Port Pin for Communication
Reduce Component Count with Integrated Temperature Sensor and EEPROM
Measures Temperatures from -55°C to +125°C
- ±0.5°C Accuracy from -10°C to +85°C
- Programmable Resolution from 9 Bits to 12 Bits
- No External Components Required
Parasitic Power Mode Requires Only 2 Pins for Operation (DQ and GND)
Simplifies Distributed Temperature-Sensing Applications with Multidrop Capability
- Each Device Has a Unique 64-Bit Serial Code Stored in On-Board ROM
Flexible User-Definable Nonvolatile (NV) Alarm Settings with Alarm Search Command Identifies Devices with Temperatures Outside Programmed Limits
Available in 8-Pin SO (150 mils), 8-Pin μSOP, and 3-Pin TO-92 Packages
Parts List
I used an expander with the raspberry pi pico fitted to it but you can quite easily connect the neopixel module directly to the board with cables
| Name | Link |
| Raspberry Pi Pico | pimoroni |
| DS18b20 | DS18B20 single-bus digital temperature measurement sensor module |
| Connecting cables | Free shipping Dupont line 120pcs 20cm male to male + male to female and female to female jumper wire |
Layout
An easy module to connect, you simply need to supply 3.3v and gnd for power and pick a GPIO pin for the output. I picked 16 but you can pick a different one but you will have to change the code
I actually bought a module but if you just buy a sensor then you need to fit a 4k7 resistor between DQ and Vcc. The module above takes care of this
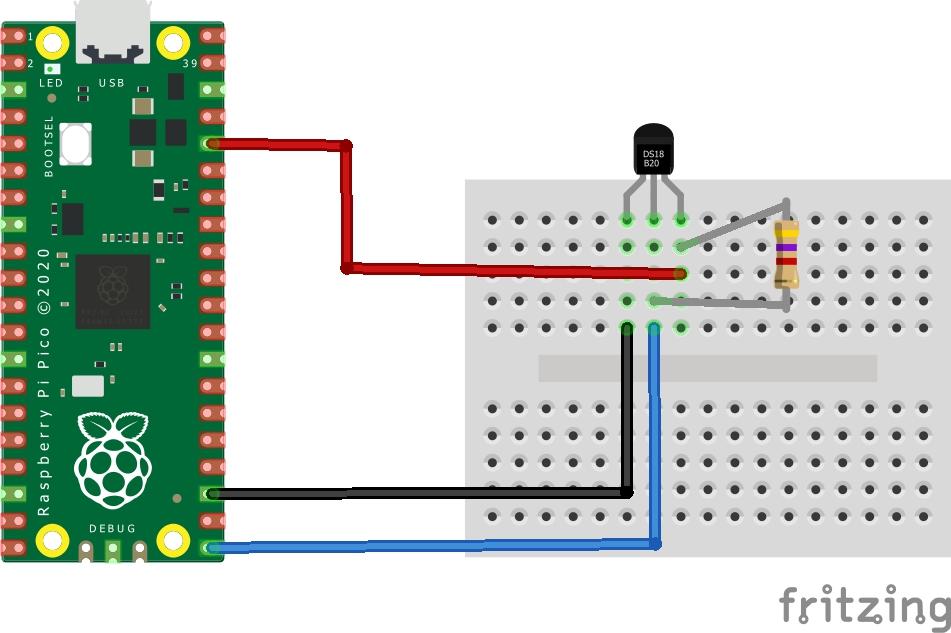
pico and ds18b20
Code
I used the thonny IDE that supports Micropython on the Raspberry Pi Pico
You need to import several libraries – import machine, onewire, ds18x20, time
We then specify the pin we are using, in this case I use pin 16, you can of course change this and change the code and it should work OK. We then scan for a sensor and display a message.
You must execute the convert_temp() function to initiate a temperature reading, then wait at least 750ms before reading the value.
You use the read_temp function to return a value and we then pause for 2 seconds and run this again
[codesyntax lang=”python”]
import machine, onewire, ds18x20, time

ds_pin = machine.Pin(16)
ds_sensor = ds18x20.DS18X20(onewire.OneWire(ds_pin))

roms = ds_sensor.scan()
print('Found a ds18x20 device')

while True:
  ds_sensor.convert_temp()
  time.sleep_ms(750)
  for rom in roms:
    print(ds_sensor.read_temp(rom))
  time.sleep(2)
[/codesyntax]
Save this and upload it to your Pico and if you are using the Thonny IDE run it
You should see something like this in the REPL window when run the example
22.125
22.125
22.125
22.125
22.125
22.1875
22.1875
22.125
Links
https://datasheets.maximintegrated.com/en/ds/DS18B20.pdf