


The PCF8591 is a single-chip, single‑supply low‑power 8‑bit CMOS data acquisition device with four analog inputs, one analog output and a serial I²C‑bus interface. Three address pins A0, A1 and A2 are used for programming the hardware address, allowing the use of up to eight devices connected to the I²C‑bus without additional hardware. Address, control and data to and from the device are transferred serially via the two-line bidirectional I²C‑bus.
The functions of the device include analog input multiplexing, on-chip track and hold function, 8-bit analog‑to‑digital conversion and an 8‑bit digital‑to‑analog conversion. The maximum conversion rate is given by the maximum speed of the I²C-bus.
Features
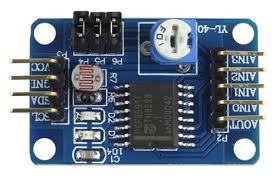
Here is a module, this has a potentiometer, LDR and a thermistor attached which can be used for testing and can be disabled by removing the shunts
Connection
|
Raspberry Pi |
PCF8591 Module |
|
|
SDA |
SDA |
|
|
SCL |
SCL |
|
|
3V3 |
VCC |
|
|
GND |
GND |
Code
This first one is written in C and uses wiringPi
#include <stdio.h>
#include <wiringPi.h>
#include <pcf8591.h>

#define PCF 120

int main (void)
{
 int value ;
 wiringPiSetup () ;
 // Setup pcf8591 on base pin 120, and address 0x48
 pcf8591Setup (PCF, 0x48) ;
 while(1) // loop forever
 {
 value = analogRead (PCF + 0) ;
 printf("%d\n", value);
 analogWrite (PCF + 0, value) ;
 delay (10) ;
 }
 return 0 ;
}
Here is a python example
import smbus
import time

# for RPI version 1, use "bus = smbus.SMBus(0)"
bus = smbus.SMBus(1)

#check your PCF8591 address by type in 'sudo i2cdetect -y -1' in terminal.
def setup(Addr):
 global address
 address = Addr

def read(chn): #channel
 try:
 if chn == 0:
 bus.write_byte(address,0x40)
 if chn == 1:
 bus.write_byte(address,0x41)
 if chn == 2:
 bus.write_byte(address,0x42)
 if chn == 3:
 bus.write_byte(address,0x43)
 bus.read_byte(address) # dummy read to start conversion
 except Exception, e:
 print "Address: %s" % address
 print e
 return bus.read_byte(address)

def write(val):
 try:
 temp = val # move string value to temp
 temp = int(temp) # change string to integer
 # print temp to see on terminal else comment out
 bus.write_byte_data(address, 0x40, temp)
 except Exception, e:
 print "Error: Device address: 0x%2X" % address
 print e

if __name__ == "__main__":
 setup(0x48)
 while True:
 print 'AIN0 = ', read(0)
 print 'AIN1 = ', read(1)
 print 'AIN2 = ', read(2)
 print 'AIN3 = ', read(3)
 print ' '
 tmp = read(0)
 tmp = tmp*(255-125)/255+125 # LED won't light up below 125, so convert '0-255' to '125-255'
 write(tmp)
 time.sleep(1.0)
Links
Datasheet – https://www.nxp.com/documents/data_sheet/PCF8591.pdf
Raspberry Pi