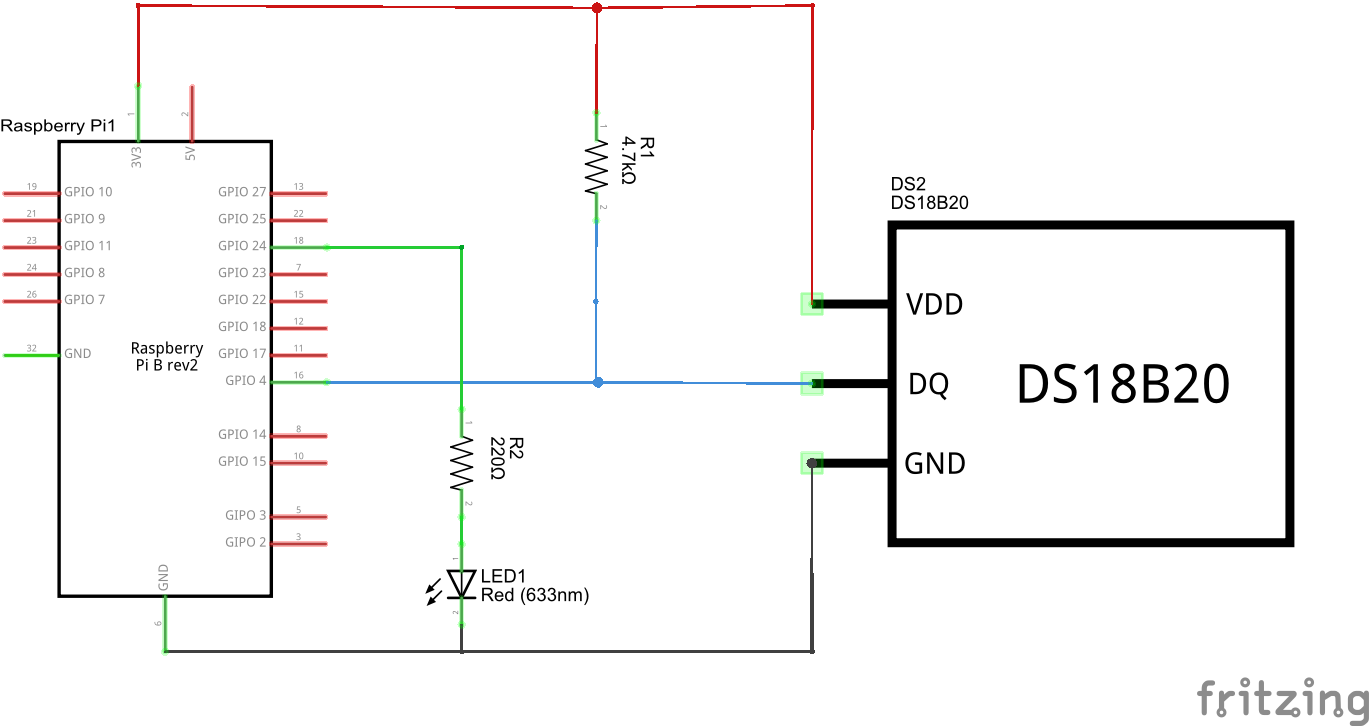
Connect a DS18b20 temperature sensor to your Raspberry PI as follows. I used a breakout for this. In this example we will just be using terminal commands
Now you need to enter the following at the command prompt:
[codesyntax lang=”bash”]
sudo nano /boot/config.txt
[/codesyntax]
to open the /boot/config.txt file for editing. Then scroll down to the bottom of the file, and add the line:
dtoverlay=w1-gpio
save the amended file and reboot the Raspberry Pi so that the changes take effect.
Enter the following at a command prompt
[codesyntax lang=”bash”]
sudo modprobe w1-gpio
sudo modprobe w1_therm

cd /sys/bus/w1/devices/
ls
cat /sys/bus/w1/devices/28-0000027a4334/w1_slave
[/codesyntax]
You will see something like the following, the t=20347 is the temperature reading, in this example that is 20.347 celsius