


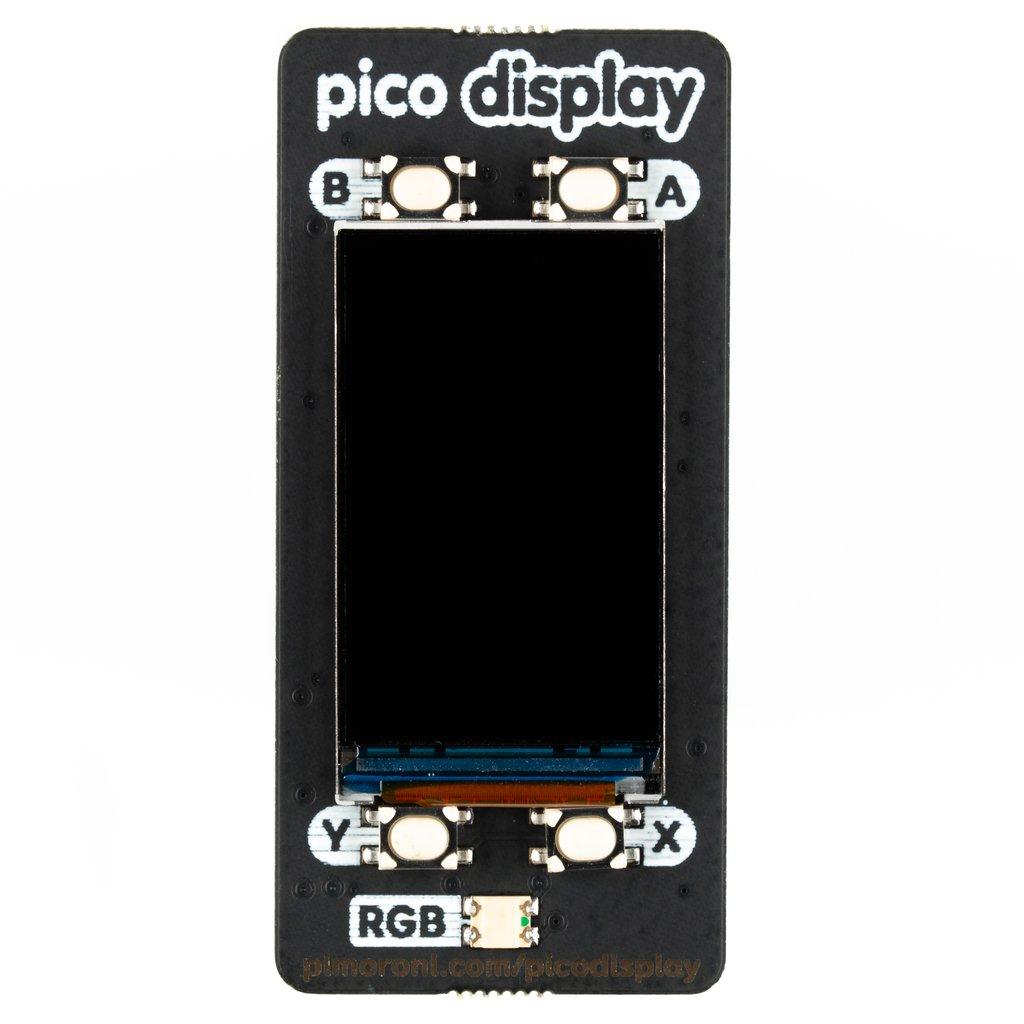
In this article we look at the Pico Display Pack which is an 18-bit capable 240×135 pixel IPS display. The pack also has four tactile buttons and an RGB LED that you can use as an indicator.
Features
1.14” 240×135 pixel IPS LCD screen
4 x tactile buttons
RGB LED
Pre-soldered female headers for attaching to Pico
Compatible with Raspberry Pi Pico.
Here is a pinout of display pack, you can see the pins that are used for the 4 buttons, the RGB LED is controlled by 3 pins and the LCD is an SPI type.
You can power this using USB or external power

Getting started
The labels on the underside of Pico Display will show you which way round to plug it into your Pico – just match up the USB port with the markings on the board.
The easiest way to get started is by downloading and copying the custom MicroPython uf2 to your Pico, it includes all the libraries you’ll need to use our add-ons.
https://github.com/pimoroni/pimoroni-pico/releases/latest/
To be able to copy this file on to your Pico, you’ll need to put it into bootloader mode. To do this, hold down the BOOTSEL button whilst plugging the USB cable into your computer – it should now show up as a drive called RPI-RP2. Here’s what it looks like in Windows:
Copy the downloaded .uf2 file across to this new drive. Your Pico will now reboot
Code examples
There are several good examples at https://github.com/pimoroni/pimoroni-pico/tree/main/micropython/examples/pico_display
Here is an example
[codesyntax lang=”python”]
# This example takes the temperature from the Pico's onboard temperature sensor, and displays it on Pico Display Pack, along with a little pixelly graph.
# It's based on the thermometer example in the "Getting Started with MicroPython on the Raspberry Pi Pico" book, which is a great read if you're a beginner!

import machine
import utime
import gc

# Pico Display boilerplate
import picodisplay as display
width = display.get_width()
height = display.get_height()
gc.collect()
display_buffer = bytearray(width * height * 2)
display.init(display_buffer)

# reads from Pico's temp sensor and converts it into a more manageable number
sensor_temp = machine.ADC(4)
conversion_factor = 3.3 / (65535)
temp_min = 10
temp_max = 30
bar_width = 5

# Set the display backlight to 50%
display.set_backlight(0.5)

temperatures = []

colors = [(0, 0, 255), (0, 255, 0), (255, 255, 0), (255, 0, 0)]


def temperature_to_color(temp):
    temp = min(temp, temp_max)
    temp = max(temp, temp_min)

    f_index = float(temp - temp_min) / float(temp_max - temp_min)
    f_index *= len(colors) - 1
    index = int(f_index)

    if index == len(colors) - 1:
        return colors[index]

    blend_b = f_index - index
    blend_a = 1.0 - blend_b

    a = colors[index]
    b = colors[index + 1]

    return [int((a[i] * blend_a) + (b[i] * blend_b)) for i in range(3)]


while True:
    # fills the screen with black
    display.set_pen(0, 0, 0)
    display.clear()

    # the following two lines do some maths to convert the number from the temp sensor into celsius
    reading = sensor_temp.read_u16() * conversion_factor
    temperature = 27 - (reading - 0.706) / 0.001721

    temperatures.append(temperature)

    # shifts the temperatures history to the left by one sample
    if len(temperatures) > width // bar_width:
        temperatures.pop(0)

    i = 0
    for t in temperatures:
        # chooses a pen colour based on the temperature
        display.set_pen(*temperature_to_color(t))

        # draws the reading as a tall, thin rectangle
        display.rectangle(i, height - (round(t) * 4), bar_width, height)

        # the next tall thin rectangle needs to be drawn
        # "bar_width" (default: 5) pixels to the right of the last one
        i += bar_width

    # heck lets also set the LED to match
    display.set_led(*temperature_to_color(temperature))

    # draws a white background for the text
    display.set_pen(255, 255, 255)
    display.rectangle(1, 1, 100, 25)

    # writes the reading as text in the white rectangle
    display.set_pen(0, 0, 0)
    display.text("{:.2f}".format(temperature) + "c", 3, 3, 0, 3)

    # time to update the display
    display.update()

    # waits for 5 seconds
    utime.sleep(5)
[/codesyntax]
and this example shows how to use the buttons
[codesyntax lang=”python”]
# This example shows you a simple, non-interrupt way of reading Pico Display's buttons with a loop that checks to see if buttons are pressed.

import picodisplay as display
import utime

# Initialise display with a bytearray display buffer
buf = bytearray(display.get_width() * display.get_height() * 2)
display.init(buf)
display.set_backlight(0.5)


# sets up a handy function we can call to clear the screen
def clear():
    display.set_pen(0, 0, 0)
    display.clear()
    display.update()


while True:
    if display.is_pressed(display.BUTTON_A):              # if a button press is detected then...
        clear()                                           # clear to black
        display.set_pen(255, 255, 255)                    # change the pen colour
        display.text("Button A pressed", 10, 10, 240, 4)  # display some text on the screen
        display.update()                                  # update the display
        utime.sleep(1)                                    # pause for a sec
        clear()                                           # clear to black again
    elif display.is_pressed(display.BUTTON_B):
        clear()
        display.set_pen(0, 255, 255)
        display.text("Button B pressed", 10, 10, 240, 4)
        display.update()
        utime.sleep(1)
        clear()
    elif display.is_pressed(display.BUTTON_X):
        clear()
        display.set_pen(255, 0, 255)
        display.text("Button X pressed", 10, 10, 240, 4)
        display.update()
        utime.sleep(1)
        clear()
    elif display.is_pressed(display.BUTTON_Y):
        clear()
        display.set_pen(255, 255, 0)
        display.text("Button Y pressed", 10, 10, 240, 4)
        display.update()
        utime.sleep(1)
        clear()
    else:
        display.set_pen(255, 0, 0)
        display.text("Press any button!", 10, 10, 240, 4)
        display.update()
    utime.sleep(0.1)  # this number is how frequently the Pico checks for button presses
[/codesyntax]
Products
| Name | Link |
| Pico | Raspberry Pi Pico Development Board A Low-Cost High-Performance Microcontroller Board RP2040 Cortex-M0+ Dual-Core ARM Processor |
| Pico Display pack UK | Pico Display Pack |